Best Permanent Adhesive Vinyl for Mugs Design
2024-06-25
Choosing the Right Transfer Tape for adhesive vinyl
2024-07-02Cutting permanent adhesive vinyl can be a game-changer for your DIY projects, craft business, or personal hobbies. But getting those perfect cuts? It can be a real challenge! If you’ve struggled with jagged edges, misaligned designs, or just plain frustration, you’re not alone. Thankfully, with a few insider tips and tricks, you’ll be slicing through vinyl like a pro in no time. Whether you’re a seasoned crafter or a newbie, this guide will help you master the art of cutting permanent adhesive vinyl.
Understanding Your Vinyl
Types of Permanent Vinyl
Permanent vinyl comes in various finishes, including glossy, matte, and metallic. Each type has its own unique properties and best use cases. Glossy vinyl, for example, is great for vibrant, eye-catching designs, while matte vinyl offers a more subdued, elegant look.
Uses and Applications
From custom decals for cars and windows to personalized gifts and home decor, permanent vinyl is incredibly versatile. Its durability makes it suitable for items that need to withstand the elements, such as outdoor signs and mailboxes.
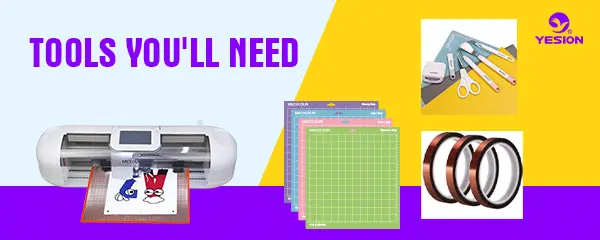
Tools You’ll Need
To get started, ensure you have the following tools:
Cutting machine
Cutting mat
Weeding tools
Transfer tape
Scissors or a craft knife

Tools You’ll Need
Preparing Your Design
Choosing the Right Design
Not all designs are created equal when it comes to cutting permanent adhesive vinyl. Simpler designs with clean lines and fewer intricate details will cut more smoothly and weed easier. If you’re a beginner, start with something straightforward and work your way up to more complex projects.
Adjusting Your Design
Before sending your design to the cutting machine, make sure it’s properly adjusted. Here’s how:
Resize Appropriately: Make sure your design fits your project space.
Check for Connectivity: Ensure all parts of your design are connected or close enough to prevent pieces from falling apart.
Mirror Your Design: For any design that involves text or a specific orientation, don’t forget to mirror it before cutting, especially if you’re applying it to the inside of a window or glass.
Cutting Permanent Adhesive Vinyl
Setting Up Your Cutting Machine
Every cutting machine is a bit different, so refer to your machine’s manual for specific instructions. However, these general steps will help you set up for success:
Load the Vinyl: Place your vinyl on the cutting mat with the adhesive side down.
Select the Right Blade: Ensure your cutting blade is sharp and suitable for vinyl.
Adjust the Settings: Choose the correct settings for permanent adhesive vinyl. Most machines have presets, but you can manually adjust the pressure and speed if needed.
Tips for Perfect Cuts
Test Cuts: Always start with a test cut. This small step can save you a lot of hassle and wasted material.
Maintain Your Blade: Keep your blade clean and replace it when it gets dull.
Slow Down: For intricate designs, slow down the cutting speed to ensure precise cuts.
Use a Brayer: A brayer helps to press the vinyl firmly onto the mat, preventing slips and ensuring a clean cut.
Weeding Your Vinyl
What is Weeding?
Weeding is the process of removing the excess vinyl from around your design. It can be a tedious task, but it’s crucial for a polished final product.
Weeding Tips and Tricks
Good Lighting: Proper lighting helps you see the cut lines more clearly.
Weeding Tools: Use sharp weeding tools to easily pick out small pieces.
Patience is Key: Take your time, especially with intricate designs.
Reverse Weeding: For particularly tricky designs, try reverse weeding—apply the transfer tape first, then weed the vinyl.
Applying Your Vinyl
Using Transfer Tape
Transfer tape is essential for moving your vinyl design from the backing paper to your project surface without losing its shape.
Cut the Transfer Tape: Cut a piece slightly larger than your design.
Apply the Tape: Smoothly apply the transfer tape over your design, using a scraper tool to press it down firmly.
Remove the Backing: Carefully peel away the vinyl backing paper, ensuring the vinyl sticks to the transfer tape.
Positioning and Application
Position the Design: Carefully position your design on your project surface.
Apply Pressure: Use a scraper tool to press the vinyl down firmly, starting from the center and moving outward to remove any air bubbles.
Remove the Transfer Tape: Slowly peel away the transfer tape, leaving the vinyl on your project surface.
How To Use YESION Holographic Craft adhesive Vinyl for DIY?
Troubleshooting Common Issues
Even with the best tips and tricks, sometimes things go awry. Here are some common problems and how to fix them:
Vinyl Not Sticking
Clean the Surface: Make sure the surface is clean and free of dust or oils.
Apply More Pressure: Use a scraper tool to press down the vinyl more firmly.
Use Heat: A little heat from a hairdryer can help activate the adhesive.
Jagged Edges
Check Your Blade: Make sure your blade is sharp and clean.
Adjust the Speed: Slow down the cutting speed for more precision.
Double Cut: For thicker vinyl, consider setting your machine to double cut.
Design Not Weeding Properly
Check Your Settings: Ensure your cut settings are correct for the type of vinyl.
Use Quality Vinyl: Sometimes, low-quality vinyl doesn’t cut or weed well.
Patience: Take your time and work carefully.
Cutting permanent adhesive vinyl can seem daunting at first, but with the right tips and tricks, it becomes a straightforward and enjoyable process. From preparing your design and setting up your cutting machine to weeding and applying the vinyl, every step is crucial for achieving professional results.
For more information and resources on cutting permanent adhesive vinyl, visit Yesion’s adhesive vinyl solutions.
Related:
Adhesive Vinyl and Cricut Machines: A Perfect Pairing
FAQs
Yes, you can reuse transfer tape until it loses its stickiness. Just make sure it’s clean and free of debris before reapplying it.
If your vinyl is peeling off, it could be due to insufficient pressure during application, a dirty surface, or low-quality vinyl. Make sure to clean your surface thoroughly and apply firm pressure when adhering the vinyl.
Store vinyl rolls upright in a cool, dry place to prevent curling and damage. Keep them out of direct sunlight to avoid fading.

