Choosing the Best Transfer Tape for Vinyl in 2023
2023-11-28
Achieving Stunning Results with Dark T-Shirt Transfers
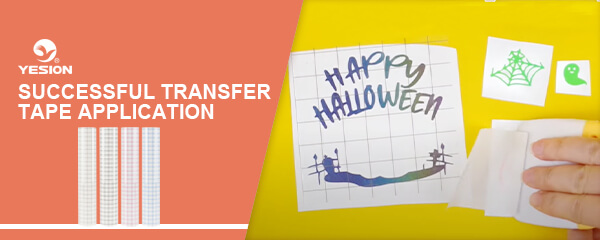
2023-12-05Transfer tape is a versatile tool used in various crafting and DIY projects to transfer adhesive vinyl designs from their backing paper to a desired surface. It plays a crucial role in ensuring precise alignment and smooth application of intricate designs. In this comprehensive guide, we will walk you through the step-by-step process of successful transfer tape application.
What is Transfer Tape?
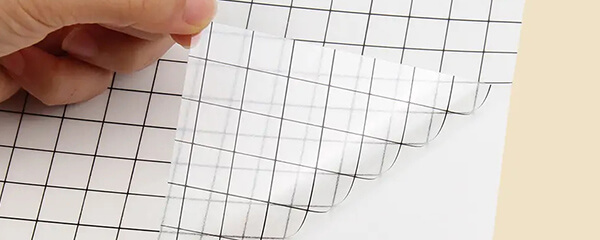
Transfer tape, also known as application tape, is a semi-transparent paper or film with adhesive on one side. It acts as a temporary carrier for vinyl designs and is used to transfer vinyl designs from their backing paper to the desired surface. The adhesive on the transfer tape holds the vinyl securely, allowing you to position and apply it accurately. Transfer tape comes in different levels of tackiness to suit different types of vinyl and project requirements.

transfer tape with adhesive
Choosing the Right Transfer Tape
Before we dive into the application process, it’s important to understand the different types of transfer tape available. About how to choose the right transfer tape for your project, please refer to the previous article: Choosing the Best Transfer Tape for Vinyl in 2023
Step-by-Step Transfer Tape Application
Follow these steps to achieve successful transfer tape application:
Step 1: Prepare Your Design
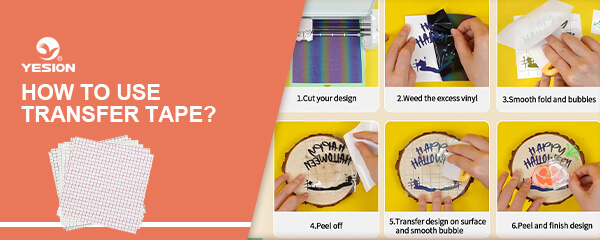
Start by cutting your adhesive vinyl design using a cutting machine or by hand. Weed out the excess vinyl, leaving only the desired design on the backing paper. Ensure that the design is clean and free from any debris or loose vinyl pieces.
Step 2: Cut and Prepare Transfer Tape
Cut a piece of transfer tape slightly larger than your design. Peel off the backing paper from the transfer tape, exposing the adhesive side.
Step 3: Align and Apply Transfer Tape
Carefully align the adhesive side of the transfer tape with your vinyl design. Start from one edge and slowly lower the transfer tape onto the vinyl, applying gentle pressure to ensure proper adhesion. Use a squeegee or a credit card to smooth out any air bubbles or wrinkles, working from the center towards the edges.
Step 4: Secure and Burnish the Design
Once the transfer tape is applied to the vinyl design, use a burnishing tool, such as a squeegee or the edge of a credit card, to firmly press down on the design. This helps the transfer tape adhere to the vinyl and ensures a strong bond between the tape and the design.
Step 5: Peel off the Backing Paper
Hold the transfer tape and vinyl design firmly in place. Starting from one corner, slowly peel off the backing paper at a 45-degree angle. Make sure the vinyl design adheres to the transfer tape as you peel away the backing paper. If any part of the design doesn’t stick to the transfer tape, press it down again with the burnishing tool.
Step 6: Apply the Design to the Desired Surface
Carefully position the transfer tape with the vinyl design onto the desired surface. Start from one edge and gradually lower the transfer tape onto the surface, applying firm and even pressure. Use the burnishing tool to smooth out the design, ensuring good adhesion to the surface.
Step 7: Remove the Transfer Tape
Once the vinyl design is applied to the surface, slowly peel off the transfer tape at a 45-degree angle. Start from one corner and pull back the tape, making sure the vinyl design remains adhered to the surface. If any part of the design starts to lift, press it down again with the burnishing tool and continue removing the tape.
You can follow this video and learn how to use transfer tape:
Tips for Successful Transfer Tape Application
Consider the following tips to enhance your transfer tape application process:
Choose the Right Transfer Tape: Different types of vinyl and project requirements may call for different levels of tackiness in transfer tape. Experiment with different brands and types of transfer tape to find the one that works best for your specific needs.
Clean the Surface: Ensure that the surface you are applying the vinyl design to is clean, dry, and free from dust or oils. This will help the design adhere properly and prevent any lifting or bubbling.
Use a Leveling Tool: A leveling tool, such as a bubble level or a ruler, can help you achieve precise alignment and straight application of the transfer tape. Place the tool across the design and adjust the positioning as needed before applying the transfer tape.
Practice on Scrap Material: If you’re new to using transfer tape or working with intricate designs, practice on scrap vinyl and materials before applying the design to your final project. This will help you gain confidence and improve your technique.
Apply Firm and Even Pressure: When applying the transfer tape to the vinyl design and the surface, use firm and even pressure to ensure good adhesion. This will help prevent any air bubbles or wrinkles and ensure a smooth application.
Take Your Time: Rushing the transfer tape application process can lead to mistakes and uneven application. Take your time, work slowly and carefully, and pay attention to details for the best results.
Successful transfer tape application is a key factor in achieving professional-looking vinyl designs on various surfaces. By following the step-by-step process outlined in this guide and implementing the provided tips, you can ensure precise alignment, smooth application, and long-lasting results. Whether you’re working on a DIY project, crafting personalized gifts, or creating professional signage, mastering the art of transfer tape application will elevate the quality of your work and bring your designsto life.
Looking for high-quality transfer tape for vinyl, YESION is your most reliable partner, please feel free to visit our products and contact us!


