Optimal Inkjet Settings for Double-Sided Photo Paper
2025-08-08
How to Prevent Waterslide Decal Cracks After Drying
2025-08-22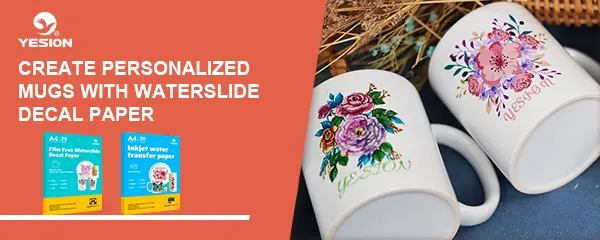
Personalized mugs are more than just drinkware — they are memorable keepsakes, creative gifts, and even profitable products. One of the easiest and most professional ways to decorate mugs is by using waterslide decal paper. With its smooth, high-resolution print finish, you can transfer your designs directly onto ceramic surfaces, achieving a glossy and long-lasting result.
What is Waterslide Decal Paper?
Waterslide decal paper is a special transfer medium that allows you to print detailed designs using an inkjet or laser printer and then transfer them onto surfaces such as ceramic, glass, metal, or plastic. Once applied and sealed, the decal gives your mug a professional, high-gloss finish that feels smooth to the touch.
Why Use Waterslide Decals for Mugs?
- High-Resolution Prints – Achieve sharp and vibrant colors for your designs.
- Smooth Finish – Looks as if it’s part of the mug, not a sticker.
- Customizable – Create one-of-a-kind gifts or branded merchandise.
- Durable with Proper Sealing – Resistant to scratches and fading when sealed properly.
What You’ll Need
- Waterslide Decal Paper for Mugs (Inkjet or Laser type)
- Printer (compatible with your decal paper type)
- Clear Acrylic Spray (for inkjet decals to prevent ink bleeding)
- Scissors or a craft knife
- Bowl of Water (room temperature)
- Mug (ceramic or enamel works best)
- Soft Cloth or Paper Towel
- Optional: Oven (for heat-curing and durability)

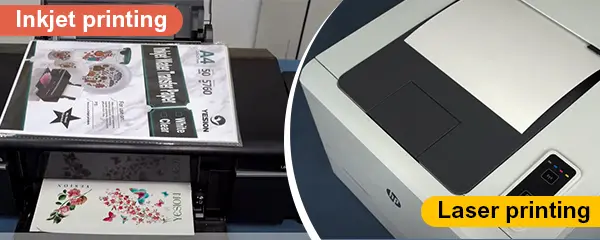
inkjet and laser printing
Step-by-Step Guide to Applying Waterslide Decals on Mugs
1. Create Your Design
Use your preferred design software to create or import your mug artwork. Ensure it matches the mug’s printable area and is in high resolution (300 DPI) for the best results.
2. Print on Waterslide Decal Paper
- For inkjet printers, print on the glossy side and let the ink dry completely.
- For laser printers, print directly on the glossy side without extra drying time.
3. Seal the Ink (Inkjet Only)
Spray 3–4 light coats of clear acrylic spray over the printed design, allowing each coat to dry before the next. This step prevents the ink from running when soaked in water.
4. Cut Out Your Design
Trim as close to the edges as possible for a neat appearance.
5. Soak in Water
Submerge the decal in water for 30–60 seconds until the backing paper loosens.
6. Apply to the Mug
Slide the decal gently onto the mug’s surface. Position it accurately and smooth out any air bubbles using your fingers or a soft cloth.
7. Dry and Seal
Let the mug air dry for at least 3 hours. For extra durability, bake it in the oven at 160°C (320°F) for 10–15 minutes or apply a food-safe sealant.
Pro Tips for Professional Results
- Always handle the decal carefully to avoid tearing.
- Work on a clean, dust-free surface.
- Avoid dishwasher use unless the decal is fully heat-cured and sealed.
- Practice on a spare mug before working on your final product.
Perfect for Gifts, Businesses, and Branding
Waterslide decals are ideal for:
- Personalized Gifts – Birthdays, weddings, anniversaries.
- Promotional Products – Company logos, slogans, or event branding.
- Creative Side Businesses – Sell custom mugs online or at craft fairs.
Bulk Wholesale Available Worldwide
Yesion is a professional supplier of waterslide decal paper, offering bulk wholesale services to global customers. Whether you are a retailer, distributor, or custom print shop, we provide high-quality decal paper at competitive prices to support your business needs.
Related:
Laser and Inkjet Waterslide Decal Paper: What You Need to Know
Do You Need Special Ink for Waterslide Paper?
Choosing the Right Waterproof Sticker Paper for Inkjet Printer
Is Waterslide Decal Paper Permanent?
Waterslide Decal Paper Crafters and Hobbyists