What paper do you use for waterslide decals?
2024-10-09
What Does Infusible Ink Transfer Best On?
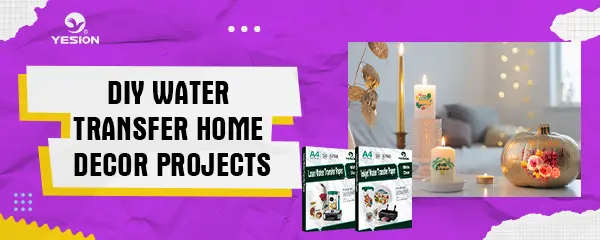
2024-10-15Water transfer techniques have become increasingly popular for adding unique and personalized touches to home decor. By using water transfer paper, you can easily transform ordinary household items into customized pieces that showcase your style. This method allows you to apply intricate designs and artwork onto a wide range of surfaces, such as ceramics, glass, wood, and even metal. In this article, we’ll explore some exciting DIY water transfer home decor projects that you can try at home to elevate your living space.
Why Use Water Transfer for Home Decor?
Water transfer, or waterslide decals, offers a versatile way to create one-of-a-kind decor pieces without the need for professional skills. The process is easy to learn, inexpensive, and produces professional-looking results. Whether you’re looking to refresh old decor items or create new pieces from scratch, this technique provides endless opportunities for personalization.
Essential Tools for Water Transfer Projects
Before diving into your DIY water transfer projects, it’s essential to gather the right materials. Here’s what you’ll need for most water transfer home decor projects:
Waterslide paper (available for inkjet or laser printers)
Acrylic sealer spray (for inkjet prints)
Scissors or precision knife
Bowl of water
Soft sponge or squeegee
Surface of choice (ceramics, glass, wood, metal)
Related:
Water Transfer Paper Printer Compatibility
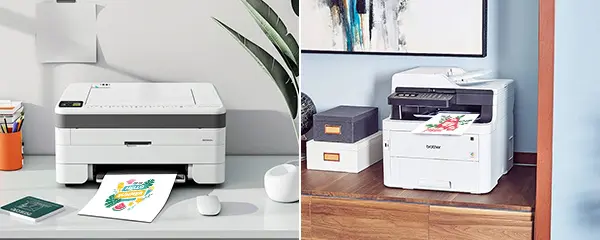
inkjet and laser print
Some exciting DIY water transfer home decor ideas
1. Custom Ceramic Mugs
Personalizing ceramic mugs is one of the most popular DIY water transfer projects. You can create custom designs for gifts or elevate your own kitchenware.
Steps:
Design Your Artwork: Create a custom design using graphic software or find a printable design online.
Print on Waterslide Paper: Print the design on clear or white waterslide decal paper, depending on your mug color. If you’re using an inkjet printer, don’t forget to seal the print with an acrylic spray.
Cut and Soak: Cut out your design and soak it in water for 30-60 seconds until the backing loosens.
Apply to Mug: Carefully slide the decal onto the mug’s surface and use a sponge to remove any air bubbles.
Seal: Let the decal dry, then seal it with a clear coat of spray for durability.
This process can also be applied to ceramic plates, bowls, or other kitchenware items.
2. Personalized Glass Vases
Glass vases provide a clean, clear canvas for beautiful water transfer designs. You can transform simple vases into stunning decorative pieces that fit your aesthetic or theme.
Steps:
Choose Your Design: Opt for floral patterns, abstract designs, or custom text.
Print on Clear Waterslide Paper: Print your design and follow the standard steps of cutting, soaking, and applying the decal.
Position the Design: Place the decal onto the vase, ensuring it’s aligned properly.
Smooth Out: Remove any air bubbles with a soft squeegee or sponge and let the vase dry.
Vases with custom designs can be used as centerpieces or accent pieces throughout your home.
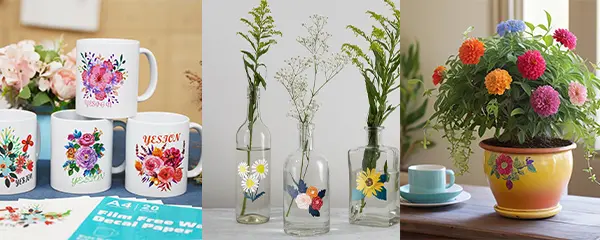
custom mugs and glass
3. Customized Plant Pots
Give your indoor garden a personal touch by decorating ceramic or terracotta plant pots with water transfer decals.
Steps:
Prepare Your Pot: Clean the surface of the pot to ensure the decal adheres properly.
Print Your Design: Consider using nature-inspired designs, geometric patterns, or personalized monograms.
Apply the Decal: Soak the decal and carefully place it onto the pot, smoothing it down with a sponge.
Seal for Outdoor Use: If you plan to keep the pot outdoors, seal the design with a waterproof clear coat.
Custom plant pots make great personalized gifts and can enhance the overall look of your indoor garden.
4. Decorative Wooden Signs
Wooden signs are a fantastic canvas for water transfer projects, especially for rustic or farmhouse-style decor. Whether it’s an inspirational quote or a custom logo, wooden signs add a personal touch to any room.
Steps:
Prepare the Surface: Sand the wood for a smooth surface and wipe away any dust.
Print Your Design: You can create personalized quotes, family names, or decorative graphics.
Transfer the Design: Apply the waterslide decal to the wood, using the same method of soaking and sliding the design into place.
Seal the Wood: To protect your design, seal the wood with a clear varnish or spray.
Hang the finished sign in your entryway, kitchen, or living room to create a focal point in the space.
5. Customized Candle Holders
For a soft, glowing touch of elegance, you can apply water transfer decals to glass or ceramic candle holders.
Steps:
Pick Your Design: Choose delicate floral designs, patterns, or holiday-themed graphics.
Print and Apply: Print the design, soak the decal, and slide it onto the candle holder.
Smooth and Seal: Smooth out the decal to remove any air bubbles and let it dry. If desired, apply a clear coat for extra protection.
These candle holders make excellent centerpieces for special occasions or everyday decor.
Related:
Decorate candles using Waterslide decal paper
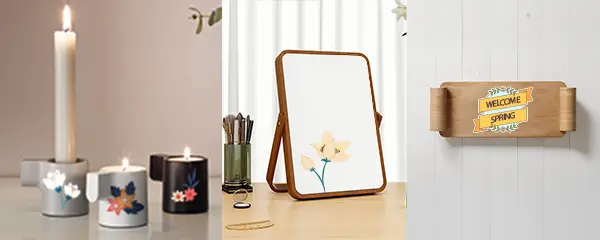
custom candle holders and mirrors
6. Personalized Mirrors
Mirrors are an unexpected but elegant surface for water transfer. Customizing the border or even the center of a mirror with designs can create a unique statement piece.
Steps:
Create a Design: Choose a pattern or quote that complements the mirror’s frame.
Print on Clear Waterslide Paper: For mirrors, clear paper allows the design to blend seamlessly with the surface.
Apply the Decal: Soak and apply the decal to the desired part of the mirror, ensuring no bubbles are trapped underneath.
Let It Dry: Allow the decal to dry completely before hanging or using the mirror.
This technique works well for small bathroom mirrors, vanity mirrors, or decorative wall mirrors.
7. Custom Coasters
Why not elevate your tabletop decor with custom coasters? Using ceramic or wooden coasters, you can transfer designs that fit your home’s theme.
Steps:
Design the Coasters: Create or select designs that match your decor, such as patterns, monograms, or symbols.
Apply the Waterslide Decals: Use clear or white waterslide paper, depending on the color of your coasters, and follow the same process for applying the decals.
Seal for Protection: Since coasters come in contact with moisture, it’s essential to apply a waterproof sealant to ensure longevity.
These custom coasters make for perfect DIY gifts or an added touch to your living room or dining area.
8. Personalized Trinket Dishes
Trinket dishes are perfect for organizing small items like jewelry, keys, or change, and adding a custom design can make them more special.
Steps:
Select a Design: Choose a design that complements the shape and color of your dish.
Apply the Decal: Use waterslide decals to transfer your design onto the dish, ensuring a smooth finish.
Seal for Durability: Once the decal is dry, apply a clear protective coat.
Personalized trinket dishes are a great way to add functional decor to your bedroom or bathroom.
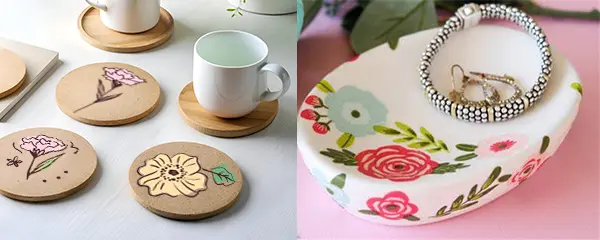
custom coasters
Tips for Successful Water Transfer Projects
Smooth Surfaces Work Best: Waterslide decals adhere best to smooth, non-porous surfaces like glass, ceramics, or metal.
Seal Inkjet Prints: If you’re using an inkjet printer, always seal the design with a clear acrylic spray to prevent smudging.
Use Clear Paper for Light Surfaces: Opt for clear waterslide paper when working on light-colored surfaces to allow the background to show through. Use white waterslide paper for dark surfaces.
Final Thoughts
Water transfer projects are a fantastic way to add custom, professional-looking touches to your home decor. With the right tools and a little creativity, you can turn everyday household items into personalized pieces that reflect your style. Whether you’re customizing mugs, coasters, or mirrors, the possibilities with waterslide decals are endless.
Related:
Waterslide Decal Paper: A Comprehensive Guide for Crafters and Hobbyists
Choosing the Perfect Waterslide Decal Paper

