Discover the Beauty of Photo Paper: Exploring Its Types, Uses, and Techniques
2023-05-17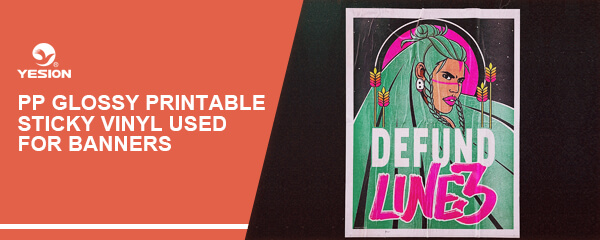
Unleash Your Creativity with PP Glossy Printable Sticky Vinyl
2023-05-23Are you ready to take your artistic endeavors to a whole new level? Imagine being able to create intricate, personalized designs and transfer them onto your skin with ease. Thanks to the wonders of technology and the advent of tattoo paper for inkjet printers, this dream is now a reality. In this comprehensive guide, we will delve into the fascinating world of tattoo paper, exploring its features, application techniques, and unleashing your inner tattoo artist.
Understanding Tattoo Paper: A Brief Overview
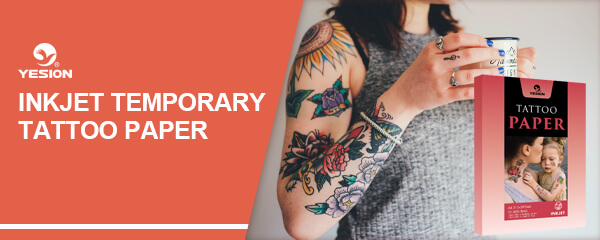
Before we dive into the nitty-gritty of tattoo paper for inkjet printers, let’s take a moment to understand what it’s all about. Tattoo paper is a specialized type of paper designed to transfer images onto the skin temporarily. It allows you to print your desired designs, logos, or even photographs using an inkjet printer, creating a custom temporary tattoo. Whether you’re looking to test-drive a tattoo design before committing to permanent ink or simply want to add a touch of temporary flair to your skin, tattoo paper opens up a world of creative possibilities.
Choosing the Perfect Tattoo Paper for Your Masterpiece
When it comes to tattoo paper for inkjet printers, not all papers are created equal. Different types of tattoo paper offer varying levels of quality, longevity, and ease of use. Here are a few key factors to consider when choosing the perfect tattoo paper for your artistic endeavors:
Ink Compatibility
Ensure that the tattoo paper you select is compatible with inkjet printers. Some papers are specifically designed for use with inkjet printers, providing optimal print quality and ink absorption.
Quality and Durability
Look for tattoo paper that offers excellent image clarity, vibrant colors, and durability. A high-quality paper will allow your temporary tattoos to withstand wear and tear, lasting longer on your skin.
Skin-Friendly Materials
Prioritize tattoo papers that are safe for skin contact. Opt for products that are hypoallergenic, non-toxic, and comply with relevant safety standards. Your skin deserves the best treatment, even if it’s just a temporary tattoo.
Ease of Application
Consider the ease of transferring the printed design onto your skin. Look for tattoo paper that offers simple application methods, whether through water-slide or adhesive-based techniques. The smoother the transfer process, the more enjoyable your tattooing experience will be.
Now that we’ve covered the basics of tattoo paper, let’s explore the step-by-step process of creating your very own temporary tattoo masterpiece.
Preparing Your Design: Unleash Your Creativity
The first step in creating a temporary tattoo using inkjet printer tattoo paper is unleashing your creativity. Whether you have a specific design in mind or want to explore various options, the digital realm is your playground. Here’s how you can prepare your design for printing:
Design Software
Use a graphic design software program like Adobe Photoshop, Illustrator, or a free alternative like GIMP or Inkscape to create or modify your desired design. The software allows you to refine your artwork, adjust colors, and add any personal touches you desire.
Image Dimensions
Consider the size and placement of your temporary tattoo. Measure the desired area on your body to ensure the design fits perfectly. Remember, size matters when it comes to temporary tattoos. Don’t be afraid to experiment with different dimensions to find the ideal fit.
Resolution and Image Quality
When it comes to creating high-quality temporary tattoos, resolution and image quality play a crucial role. You want your design to be sharp, detailed, and visually appealing. Here are some key considerations for achieving optimal resolution and image quality:
Resolution Settings
Set your design software to a high-resolution setting, such as 300 dots per inch (DPI). This ensures that the image has enough pixels to capture fine details and produce a crisp, clear print. Higher resolutions result in smoother lines and better color reproduction.
Image Format
Save your design in a suitable file format that preserves image quality. The most commonly used formats for printing are JPEG, PNG, and TIFF. JPEG is ideal for photographs, while PNG and TIFF maintain better quality for designs with transparent backgrounds or intricate details.
Color Mode
Choose the appropriate color mode for your design. For full-color tattoos, use the CMYK color mode, which stands for Cyan, Magenta, Yellow, and Key (Black). This color mode is optimized for printing and ensures accurate color representation. If your design is black and white or grayscale, use the grayscale or black and white color mode to achieve optimal results.
Image Cleanup
Before printing, take a moment to review your design and make any necessary adjustments. Remove any unwanted artifacts, smudges, or imperfections to ensure a clean and polished final result. Pay attention to small details, as they can significantly impact the overall quality of your temporary tattoo.
By following these tips, you can ensure that your design is of the highest quality before moving on to the printing process.
Printing Your Design: Bringing Your Tattoo to Life
Now that your design is ready, it’s time to bring it to life using your trusty inkjet printer. Follow these steps to print your temporary tattoo onto the specially designed tattoo paper:
Load the Tattoo Paper
Open your printer tray and load a single sheet of tattoo paper. Make sure to follow the manufacturer’s instructions regarding paper orientation and loading techniques. Proper paper alignment ensures accurate printing and avoids jams or misprints.
Printer Settings
Access your printer settings through the printer software or control panel. Adjust the settings to match the specifications of the tattoo paper you are using. Select the appropriate paper type, such as glossy or matte, and choose the highest print quality available for optimal results.
Print a Test Page
Before printing your actual design, it’s a good idea to print a test page on regular paper. This allows you to double-check the placement, size, and colors of your design. Make any necessary adjustments before proceeding to print on the tattoo paper.
Print Your Design
Once you’re satisfied with the test print, it’s time to print your design on the tattoo paper. Click the print button and wait eagerly as your inkjet printer works its magic. Ensure that the printer is not set to draft mode, as this may result in lower print quality.
Drying Time
After printing, give your tattoo paper some time to dry completely. This typically takes a few minutes, but it’s worth the wait to avoid smudging or smearing the ink.
Transferring Your Temporary Tattoo: The Moment of Truth
Now comes the exciting part—transferring your temporary tattoo from the paper to your skin. This is where the true magic happens. Follow these steps for a successful and enjoyable transfer process:
How to Use YESION Printable Tattoo Paper for Inkjet Printer?
Cut Out Your Design
Using a pair of scissors, carefully cut out your printed design. Leave a small margin around the edges to ensure that no part of the image is left out during the transfer.
Remove the Protective Layer
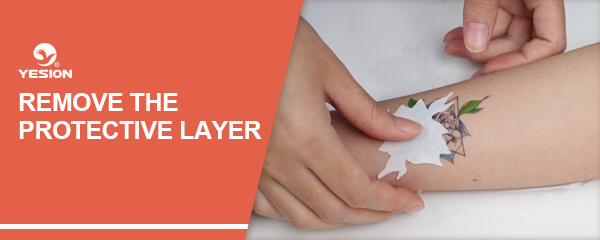
If you’re using water-slide tattoo paper, start by peeling off the protective layer from the top of the tattoo paper. This exposes the adhesive surface that will be in contact with your skin during the transfer process. Take care not to touch the adhesive with your fingers to maintain its effectiveness.
Position the Design
Carefully place the cut-out design face-down on the desired area of your skin. Ensure that it’s positioned exactly where you want the temporary tattoo to appear. Once placed, avoid moving or shifting the paper to prevent smudging or blurring of the design.
Apply Moisture
For water-slide tattoo paper, use a damp sponge or cloth to moisten the back of the paper. Gently press the moistened surface, ensuring even coverage. The moisture activates the adhesive, allowing the tattoo to slide off the paper onto your skin.
Transfer the Tattoo
With a steady hand, slide the tattoo paper from one edge to the other, carefully peeling it away from your skin. Be patient and go slowly to ensure a smooth transfer. Once the paper is fully removed, you’ll be left with your temporary tattoo beautifully displayed on your skin.
Set and Seal
To enhance the longevity of your temporary tattoo, consider applying a sealant or setting spray. This creates a protective barrier that helps prevent fading and smudging. Make sure to use a skin-friendly product that is safe for temporary tattoos.
Tattoo paper for inkjet printers has revolutionized the world of temporary body art, empowering individuals to unleash their creativity and experiment with unique designs. From testing out tattoo ideas before committing to permanent ink to adding a touch of whimsy to your everyday look, temporary tattoos offer a world of possibilities. By choosing the right tattoo paper, preparing your design meticulously, and following the proper printing and transfer techniques, you can create stunning temporary tattoos that captivate and inspire. So, grab your inkjet printer, let your imagination run wild, and embark on a journey of self-expression and artistry. The world of temporary tattoos awaits you—go forth and make your mark!
Related post:
Do temporary tattoos wash off?
How long does a temporary paper tattoo last?

