
How to Choose the Right Photo Printing Paper?
2025-03-14
Best Colored Sticker Paper for Crafting & DIY
2025-03-28
Temporary tattoos have become a popular choice for those looking to experiment with body art without long-term commitment. Using a temporary tattoo printer at home offers convenience and creativity, but it can be frustrating when issues arise with the printer paper. If you’re facing problems with your temporary tattoo paper, this detailed troubleshooting guide will help you identify and resolve the most common issues effectively.
10 Temporary Tattoo Paper Issues
Temporary Tattoo Paper Not Sticking to the Skin Issues
One of the most frequent complaints is that the tattoo paper fails to adhere properly to the skin. This issue can be caused by several factors:
Solutions:
Check Skin Preparation: Ensure the skin is clean, dry, and free from oils or lotions. Use an alcohol wipe to remove any residue before applying the tattoo.
Use Proper Pressure: When applying the tattoo, press firmly and evenly. A lack of pressure can prevent the adhesive from sticking properly.
Temperature Matters: Room temperature affects adhesion. Try to apply the tattoo paper in a room with moderate humidity and temperature.
Use the Right Type of Paper: Some tattoo papers are designed for specific printers or application methods. Double-check compatibility with your printer and follow the manufacturer’s recommendations.
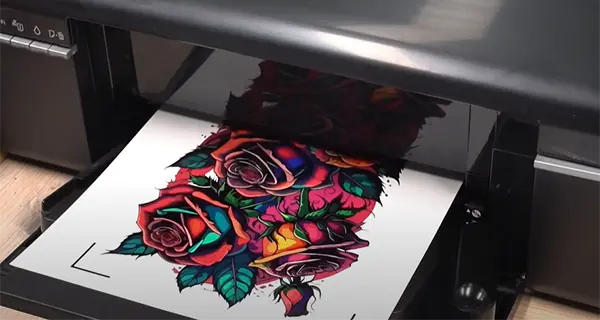
Ink Not Transferring Properly onto the Paper Issues
If the ink isn’t transferring correctly to the tattoo paper, it can result in a faded or incomplete design.
Solutions:
Adjust Printer Settings: Ensure the printer is set to “High Quality” or “Photo Mode” for the best ink transfer.
Use Compatible Ink: Not all inks work well with temporary tattoo paper. Use the ink type recommended by the paper manufacturer.
Paper Loading Direction: Ensure that the tattoo paper is loaded correctly according to the printer’s guidelines. Incorrect loading can lead to poor transfer.
Printer Maintenance: Clean the printhead and ensure that there are no ink clogs that might affect the quality of the transfer.
printing tattoo paper
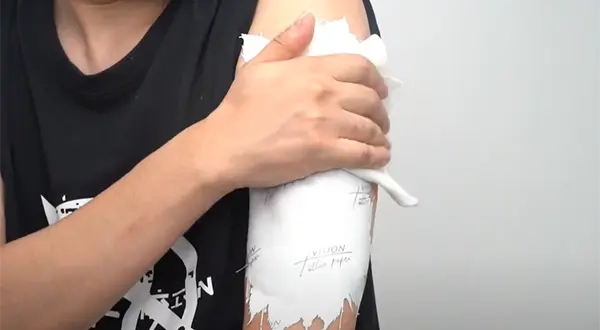
Tattoo Paper Cracking or Peeling After Application Issues
If the tattoo starts to crack or peel shortly after applying, the problem may lie in the paper quality or the application technique.
Solutions:
Avoid Stretching the Skin: When applying the tattoo, avoid stretching the skin, as this can cause the design to crack once it dries.
Proper Drying Time: Allow the tattoo to fully dry before touching or exposing it to water.
Use a Sealant Spray: After application, lightly spray a tattoo sealant to help prevent peeling and cracking.
High-Quality Paper: Lower-quality papers are more prone to peeling. Invest in high-quality temporary tattoo paper for long-lasting results.
Design Colors Appear Dull or Faded Issues
A common issue with temporary tattoos is that the printed design looks vibrant on the paper but fades or looks dull when transferred to the skin.
Solutions:
Increase Printer Resolution: Adjust your printer settings to a higher DPI (dots per inch) to improve color vibrancy.
Use the Right Paper Side: Tattoo paper often has a specific side for printing. Ensure you are using the correct side.
Color Correction: Adjust the color saturation and brightness settings on your computer before printing.
Use Pigment Ink: Pigment-based inks tend to produce more vibrant and long-lasting colors compared to dye-based inks.
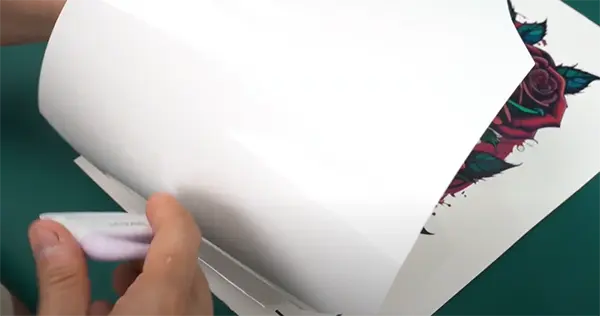
Air Bubbles Under the Tattoo Paper Issues
Air bubbles can ruin the appearance of a tattoo by creating gaps and uneven texture.
Solutions:
Smooth Application: When applying the tattoo, use a credit card or similar flat object to press out any air bubbles.
Start from One Edge: Begin application from one edge and slowly work your way across to avoid trapping air underneath.
Moist Cloth Technique: After placing the tattoo paper, press a moist cloth over it for a few seconds to help smooth out bubbles.
press out any air bubbles
Tattoo Wearing Off Too Quickly Issues
If your temporary tattoo fades or washes off quickly, the issue may stem from environmental or application factors.
Solutions:
Avoid Friction: Tattoos tend to wear off faster in areas prone to friction, like hands and feet.
Seal with Hairspray: After applying the tattoo, spray a thin layer of hairspray to help protect it.
Avoid Hot Water and Soap: Hot water and soap can dissolve the adhesive. Pat dry the tattoo after washing.
Use Waterproof Tattoo Paper: Consider switching to waterproof tattoo paper for longer-lasting results.
Paper Jamming in the Printer Issues
Paper jams can cause damage to both the printer and the tattoo paper.
Solutions:
Clean the Rollers: Dust and debris can cause paper jams. Clean the printer rollers regularly with a lint-free cloth.
Use the Correct Paper Size: Ensure the tattoo paper size matches the printer’s specifications.
Feed One Sheet at a Time: Avoid overloading the paper tray. Feeding one sheet at a time reduces the chance of jams.
Align the Paper Properly: Misalignment can cause the paper to jam or print unevenly. Adjust the paper guides accordingly.
Smudging or Smearing During Printing Issues
Smudging or smearing often happens when the ink is not drying fast enough or the paper absorbs too much ink.
Solutions:
Set to Fast-Dry Mode: If available, enable the fast-dry or quick-dry setting on your printer.
Use Quick-Dry Ink: Certain inks are designed to dry faster and reduce smudging.
Let It Dry Naturally: Allow the tattoo paper to dry completely before handling or applying.
Avoid Over-Application: Applying too much ink can cause smearing. Adjust the ink saturation level in your printer settings.
Tattoo Edges Curling or Lifting Issues
Curling edges make the tattoo look unprofessional and shorten its lifespan.
Solutions:
Press Down Firmly: After applying the tattoo, press down firmly on the edges to ensure proper adhesion.
Trim the Edges: Before applying the tattoo, trim any excess paper around the design to prevent curling.
Avoid Excess Moisture: Too much water during application can weaken the adhesive and cause curling.
Use a Fixative Spray: After the tattoo sets, use a fixative spray to hold the edges down.
hold the edges down
Printing Errors and Incomplete Designs Issues
Incomplete or distorted designs often stem from printer issues or incorrect file settings.
Solutions:
Use High-Resolution Files: Low-resolution images can appear pixelated or distorted when printed.
Check Printer Memory: If the printer’s memory is full, it may not print the entire design. Restart the printer and clear memory.
Align Print Head: Misaligned print heads can cause design distortion. Run a printer alignment test to fix the issue.
Use Vector Images: Vector-based designs are less likely to distort when resized.
Solving the problem of temporary tattoo printing paper is simple. From poor ink transfer to smudging and adhesion problems, each issue has a targeted solution that can restore the quality of your temporary tattoos. By following these detailed steps, you can ensure that your temporary tattoos look vibrant and professional every time.
Related:
Best Temporary Tattoo Printer Paper: Top Picks for 2024
Wholesale tattoo paper for Inkjet and laser
How long does a temporary paper tattoo last?