Is decal paper the same as waterslide paper?
2024-11-13
The Benefits of Using Holographic Vinyl Sticker Paper
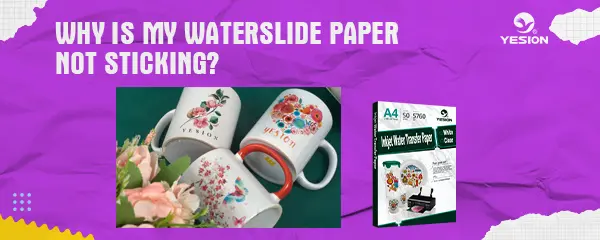
2024-11-19Waterslide decals are popular for DIY projects, custom mugs, and even nail art. But if your waterslide paper isn’t sticking, it can be disappointing! This guide will help you troubleshoot common problems and give you actionable tips to make sure your waterslide paper adheres perfectly every time.
Common Reasons Waterslide Paper Isn’t Sticking
Here are some of the primary reasons your waterslide paper may not be sticking as expected.
1. Incorrect Surface Preparation
The surface you’re applying the decal to must be clean, smooth, and dry. If there’s dust, oil, or other residues, the decal won’t adhere properly.
Solution: Use rubbing alcohol to clean the surface before applying the decal. Ensure there’s no soap or cleaner residue left.
2. Insufficient Soaking Time
Soaking time is essential to allow the design to slide off the backing paper. If you rush this step, the decal might not slide well, and the adhesive might not activate.
Solution: Soak the waterslide paper for at least 30–60 seconds in lukewarm water. You’ll know it’s ready when the decal starts to slide off the backing paper easily.
3. Wrong Type of Waterslide Paper
Waterslide papers come in different types, typically labeled as clear or white and as inkjet or laser-compatible. Using the wrong kind can affect the sticking process.
Solution: Double-check your waterslide paper to make sure it’s compatible with your printer (laser or inkjet) and suits the surface color (clear for light surfaces, white for dark surfaces).

waterslide decal application
4. Temperature & Humidity Issues
Extremely cold or humid conditions can affect the adhesive properties of the decal.
Solution: Apply the decal in a moderate environment, ideally around room temperature. Avoid applying waterslide decals in high-humidity areas, as the moisture can interfere with adhesion.
How to Fix Waterslide Paper Sticking Issues
If you’ve run into issues, here are some ways to troubleshoot and fix common problems with waterslide paper:
Reapply with Clear Acrylic Spray: If the decal is peeling off, spraying a light coat of clear acrylic sealer over the applied decal can help it adhere better. Allow it to dry thoroughly.
Press and Smooth: After sliding the decal onto the surface, gently press out any air bubbles using a soft cloth or squeegee. This will help the decal adhere more firmly.
Use a Heat Source: Carefully applying a bit of heat with a hairdryer on low or warm setting can help improve the stickiness of some decals. Be gentle and don’t overheat the decal, as this can cause it to wrinkle.
Allow Adequate Drying Time: Once applied, let the decal dry completely for at least 24 hours. Rushing this step may weaken adhesion, especially on surfaces like glass or ceramics.
How to use yesion inkjet varnish-free water transfer paper?
Pro Tips for Applying Waterslide Decals
Seal Inkjet-Printed Decals: If you’re using an inkjet printer, always seal the printed side with a clear acrylic spray to prevent the ink from bleeding when it touches water.
Practice First: If you’re new to using waterslide decals, practice on a scrap piece to get a feel for soaking time and application.
Use a Decal Solution: Some decal application solutions help soften the decal and make it more flexible. This is especially useful for curved surfaces.
Sand Rough Surfaces: If you’re applying the decal to a surface like wood, ensure it’s sanded smooth. A rough surface can create gaps under the decal, preventing proper adhesion.
Waterslide decals can be a fantastic way to personalize almost any object, but getting them to stick perfectly takes a bit of patience and the right technique. By preparing your surface, ensuring correct soaking, and making sure environmental conditions are optimal, you can improve the adhesion of your waterslide decals.
Related:
How long do waterslide decals last?
Best Waterslide Decal Paper for Inkjet Printers
Waterslide Decal Paper: A Comprehensive Guide for Crafters and Hobbyists

