Is a Heat Press Essential for T-Shirt Transfer Paper?
2024-10-04
DIY Water Transfer Home Decor Projects
2024-10-11When it comes to waterslide decals, the type of paper you use plays a crucial role in achieving the best results. Whether you’re customizing mugs, tumblers, ceramics, or even nails, selecting the right waterslide paper will make a significant difference in the final outcome. In this article, we’ll break down the different types of waterslide paper available, explain how to choose the best one for your project, and provide tips for a flawless application process.
What Is Waterslide Paper?
Waterslide paper is a special type of decal paper that allows you to transfer images onto various surfaces with the help of water. The decal “slides” off the paper when submerged in water, hence the name “waterslide.”
Types of Waterslide Paper
There are primarily two types of waterslide paper produced by Yesion factory:
Clear Waterslide Paper
Clear waterslide paper is ideal for use on light-colored surfaces. When applied, the design becomes translucent, allowing the background color to show through. This makes it perfect for white or pale-colored surfaces like white ceramic mugs, light-colored tumblers, or any other bright surface where the background can complement the design.
White Waterslide Paper
For dark-colored surfaces, white waterslide paper is the better option. Since the paper itself is opaque, it ensures that the design stays vibrant and doesn’t get lost against darker backgrounds. White waterslide paper can be used on surfaces like dark tumblers, black ceramic mugs, or any dark object where the design needs to stand out.
Is There a Special Printer for Waterslide Paper?
Absolutely! To print on waterslide paper, you’ll need either an inkjet or a laser printer.
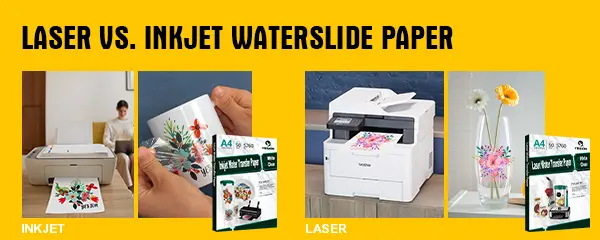
Laser vs. Inkjet Waterslide Paper
Before selecting a waterslide paper, you need to know which type of printer you have.
Inkjet Waterslide Paper
This type of waterslide paper is specifically designed for inkjet printers. If you’re using an inkjet printer, you’ll need to print your design on this type of paper and then seal it with a clear acrylic spray to prevent the ink from running when you apply the decal. Inkjet waterslide paper is widely available and is perfect for home use.
Laser Waterslide Paper
If you have access to a laser printer, you’ll need to opt for laser waterslide paper. The main benefit of using a laser printer is that you won’t need to seal the decal after printing. The toner used in laser printers is waterproof, which makes the process quicker and easier. Laser waterslide paper is a great choice for bulk projects or professional settings.

Laser vs. Inkjet Waterslide Paper
Application Process for Waterslide Paper
To ensure a smooth application and professional finish, follow these steps when working with waterslide decals:
Step 1: Print Your Design
Once you’ve selected the right waterslide paper, print your design on the paper. Make sure your printer settings are set to high quality for the best results. If you’re using inkjet waterslide paper, remember to spray the printed design with a clear acrylic sealer to prevent the ink from smudging.
Step 2: Cut Out the Design
Carefully cut around the edges of your design. The closer you cut, the more seamless the decal will appear on the surface. For complex designs, using a precision knife can help achieve cleaner cuts.
Step 3: Soak the Decal in Water
Place the cut-out design in a bowl of water and soak it for about 30-60 seconds. The backing of the waterslide paper will begin to loosen as it hydrates, making it easy to slide off when ready.
Step 4: Apply the Decal
Once the backing has loosened, gently slide the decal onto your chosen surface. Use your fingers or a soft squeegee to smooth out any air bubbles or excess water beneath the decal. Be sure to handle the decal with care, as it can tear if not properly aligned.
Step 5: Let It Dry
Allow the decal to dry thoroughly, which typically takes 2-3 hours. Once dry, you can apply a clear coat to protect the design, especially if the item will be exposed to water or heat.
How to use yesion inkjet clear water decal paper?
What Surfaces Can You Use Waterslide Paper On?
Waterslide paper is incredibly versatile! You can use it on a variety of surfaces to create custom projects:
Ceramics: Perfect for decorating mugs, plates, or tiles.
Glass: Add personal touches to glassware or create unique glass decor.
Metal: Ideal for custom metal signs or jewelry.
Plastic: Great for model makers who want to add intricate details to their creations.
Wood: Yes, even wood! You can make stunning, personalized wooden items with waterslide decals.
Nails: Nail artists, rejoice! Waterslide paper is your best friend for detailed designs.
Tips for Successful Waterslide Transfers
Working with water transfer decal paper can be a bit tricky at first, but these tips will help you master the technique in no time!
Seal Inkjet Prints: Always spray your inkjet prints with a clear acrylic sealer to prevent the ink from bleeding when you soak the decal.
Use Warm Water: Cold water may cause the decal to become too rigid, while hot water can make it too soft.
Work Quickly: Once the decal is ready to slide off, apply it immediately to your surface.
Be Gentle: Waterslide decals are delicate! Handle them with care to avoid ripping or tearing the design.
Common Mistakes to Avoid
Using the Wrong Paper for the Printer: As mentioned, inkjet paper won’t work in a laser printer and vice versa.
Skipping the Sealer (For Inkjet Users): Without sealing the ink, your beautiful design will bleed the moment it hits the water.
Not Soaking the Paper Long Enough: If you try to apply the decal before it’s ready, it’ll tear.
Not Using a Top Coat: If your item is going to be exposed to water (like a coffee mug), always apply a clear top coat to protect the design.
Applying to Uneven Surfaces: Waterslide decals work best on smooth, non-porous surfaces like ceramics, glass, and metal. If you try to apply them to textured surfaces, they may not adhere properly or could wrinkle.
How to Seal Waterslide Decals
Once you’ve successfully transferred your waterslide decal, sealing it will help ensure its longevity. Here’s how to seal waterslide decals:
Choose a Clear Spray Sealer: Go for one that’s water-resistant if you’re sealing something like a mug.
Apply in Light Coats: Hold the spray can about 8-10 inches away and apply several thin layers rather than one thick layer.
Let It Dry Completely: After spraying, give it time to cure. Don’t rush—this ensures the decal will stay put!
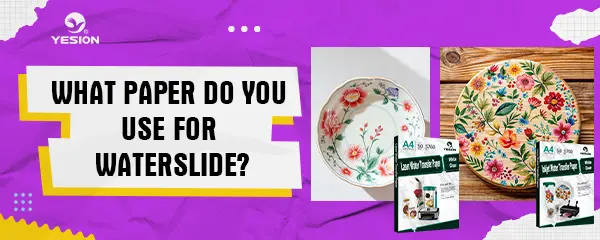
So, what paper do you use for waterslide? It all depends on your project! Whether you’re customizing ceramics, glass, or even metal, waterslide paper offers endless creative possibilities. Just remember to choose the right type—clear for light surfaces and white for dark ones—and follow the steps carefully for flawless results.
Related:
Best Waterslide Decal Paper for Inkjet Printers
Waterslide Decal Paper: A Comprehensive Guide for Crafters and Hobbyists

