How to Effectively Use Double-Sided Photo Paper
2024-09-25
2024 National Day Holiday Notice
2024-09-30Creating professional brochures can greatly enhance your marketing efforts, whether for a business, event, or personal project. One of the best materials for producing high-quality brochures is double-sided photo paper. In this blog, we’ll explore why double-sided photo paper is ideal for brochures and how to achieve top-quality prints.
Why Choose Double-Sided Photo Paper?
1. Professional Appearance
Double-sided photo paper offers a sleek and professional look, making your brochures visually appealing. The glossy finish enhances colors and images, giving your brochures a polished and vibrant look that stands out.
2. High Print Quality
The smooth surface of double-sided photo paper allows for high-resolution printing. This means your text will be sharp, and your images will be vivid, ensuring that your brochures grab attention.
3. Versatility
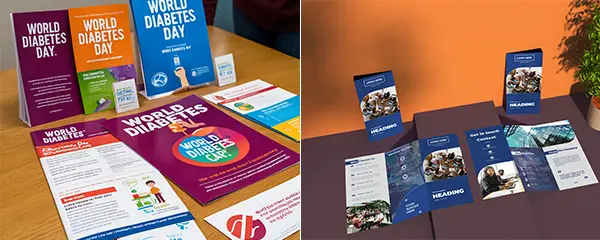
Double-sided photo paper is versatile and can be used for various types of brochures, including tri-folds, bi-folds, and more. Whether you’re creating a product showcase or an event flyer, this paper type can accommodate your design needs.
How to Achieve Top-Quality Prints
Step 1: Design Your Brochure
Start by designing your brochure using graphic design software. Ensure that your images are high resolution and that your text is clear. Consider the layout carefully to make the best use of both sides of the paper.
Step 2: Choose the Right Paper
Select double-sided photo paper that is compatible with your inkjet printer. Look for options specifically designed for printing brochures to ensure optimal results.
Step 3: Configure Printer Settings
Select Paper Type: In your printer settings, choose the option for photo paper to ensure that the printer applies the right amount of ink.
Set Print Quality: Opt for the highest print quality setting to achieve vibrant colors and sharp details.
Step 4: Print a Test Brochure
Before printing the final version, do a test print on regular paper to check alignment, color accuracy, and overall layout. This step can help you avoid costly mistakes.
Step 5: Print Your Brochure
Once you’re satisfied with the test print, load your double-sided photo paper into the printer. Make sure to follow the photo paper manufacturer‘s instructions regarding paper orientation. Print one side, allow it to dry, then flip the paper and print the other side.
Step 6: Finishing Touches
After printing, allow the brochures to dry completely. If desired, consider trimming the edges for a clean finish or folding them neatly for presentation.

Achieve Top-Quality Prints
Tips for Success
Use Quality Images: High-resolution images will make a significant difference in the final product. Avoid low-quality graphics that may appear pixelated when printed.
Consider Color Profiles: If your printer allows, use specific color profiles for the type of photo paper you are using. This helps achieve more accurate color reproduction.
Experiment with Layouts: Don’t hesitate to try different layouts and designs. Use both sides of the paper creatively to maximize the information you can provide.
Double-sided photo paper is an excellent choice for creating stunning brochures that effectively communicate your message. By following these tips and steps, you can produce professional-quality brochures that impress your audience.
Ready to get started? Gather your materials and unleash your creativity with double-sided photo paper!
Related:
Different Types of Double-Sided Photo Paper
Unlock Professional Printing Quality with Double-Sided Photo Paper

