How to Judge the Quality of Temporary Tattoo Paper?
2023-11-03
How to DIY Glass Jar/Cups with Sublimation Sticker Vinyl?
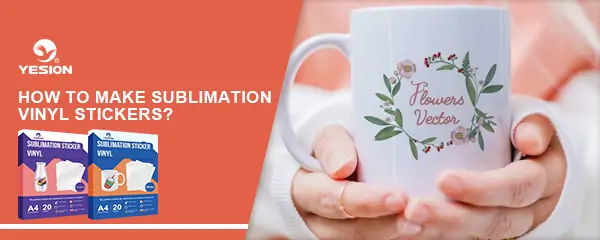
2023-11-10Vinyl stickers are a fun and versatile way to personalize your belongings or create unique products for sale. If you’re looking to create custom vinyl stickers with vibrant and long-lasting designs, sublimation printing is a fantastic option. Sublimation printing allows you to transfer high-quality designs onto vinyl material, resulting in durable and eye-catching stickers. In this article, we will guide you through the step-by-step process of making sublimation vinyl stickers.
How to make stickers with sublimation sticker vinyl?
Materials Needed
Before you start, gather the following materials:
Sublimation Printer: Ensure you have a printer specifically designed for sublimation printing. These printers use special inks that turn into gas when heated, allowing them to penetrate the vinyl surface and create vibrant designs.
Sublimation Paper: Purchase sublimation paper that is compatible with your printer. This paper has a special coating that helps the ink transfer to the vinyl.
Vinyl Sheets: Choose high-quality vinyl sheets that are suitable for sublimation printing. Look for vinyl sheets specifically designed to work well with sublimation inks. Our sublimation sticker vinyl are available in transparent and white.
Heat Press Machine: A heat press machine is essential for transferring the design from the sublimation paper to the vinyl. Make sure you have a heat press machine that can reach the required temperature for sublimation printing.
Design Software: Use graphic design software, such as Adobe Illustrator or Photoshop, to create your sticker designs. Make sure your designs are sized correctly for the vinyl sheets you’re using.
Cutting Machine: If you want to create custom shapes for your stickers, consider using a cutting machine like a Cricut or Silhouette. This step is optional if you prefer to cut the stickers by hand.
Step-by-Step Process
Now, let’s walk through the step-by-step process of making sublimation vinyl stickers:
If you want to learn how to apply sublimation sticker vinyl directly, please visit our youtube video:
Step 1: Design Creation
Use your preferred graphic design software to create your sticker designs. Let your creativity flow and customize your designs according to your preferences. Ensure that the designs are sized correctly based on the dimensions of your vinyl sheets.
Step 2: Printing
Load the sublimation paper into your sublimation printer and print your designs onto the paper. Follow the printer’s instructions for paper loading and printing settings specific to sublimation printing. Ensure that you’re using the correct color profile and settings for optimal results.
Step 3: Heat Press Setup
Preheat your heat press machine according to the manufacturer’s instructions. Set the temperature and time based on the recommended settings for sublimation printing on vinyl. It’s crucial to follow the instructions to ensure proper ink transfer and avoid damaging the vinyl.
Step 4: Transfer Process
Place the printed sublimation paper on top of the vinyl sheet with the design facing down. Ensure that the design is aligned correctly with the vinyl. Place a Teflon sheet or parchment paper on top of the sublimation paper to protect it from direct contact with the heat press. This protective layer will prevent any unwanted marks or heat damage on your design.
Step 5: Heat Press Application
Carefully place the vinyl and paper stack onto the heat press machine. Apply the recommended amount of heat and pressure, following the instructions specific to your heat press machine. The heat and pressure will cause the sublimation ink on the paper to transfer onto the vinyl, creating the sticker design. Be patient and allow the heat press to work its magic.
Step 6: Cooling and Peeling
Once the transfer process is complete, carefully remove the vinyl and paper stack from the heat press machine. Allow the vinyl to cool down completely before peeling off the sublimation paper. It’s crucial to let it cool to prevent any smudging or distortion of the design. Peel the paper slowly and gently to avoid damaging the design.
Step 7: Cut Sublimation Vinyl with Design
To use a cutting machine, load the vinyl into the machine and let it cut the transferred pattern shape for you. Or, if you prefer a hands-on approach, you can cut the vinyl by hand using scissors or a craft knife. Make sure your cuts are precise and consistent with your design.
Step 8: Finishing touches
If necessary, trim excess vinyl around the design. Take a moment to admire your beautifully crafted sublimation vinyl stickers. If you are a dealer engaged in stickers, they can now be used, shared, and even sold!
What materials can sublimation sticker vinyl be applied to?
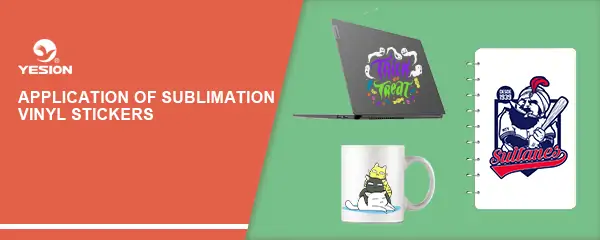
Of course, these sublimation vinyl stickers can stick to any hard surface,such as sublimation sticker vinyl is widely used for glass, acrylic, porcelain and plastic mugs; papers, agendas, notebooks, folders; musical instruments, such as a guitar and guitar top; glazing, pictures, wall clocks and more materials! Great for DIY craft enthusiasts.
Making sublimation vinyl stickers opens up a world of possibilities for creative expression and customization. By following our step-by-step guide, you can create vibrant and durable stickers that are sure to impress. Remember to experiment with different designs, colors and shapes to unleash your creativity.
If you are looking for reliable sublimation sticker vinyl suppliers, Yesion is your best choice. Yesion’s sublimation sticker vinyl is a high-quality material that offers exceptional printing results, durability, versatility, and ease of use. By choosing Yesion’s sublimation sticker vinyl, businesses and individuals can create stunning and long-lasting prints that leave a lasting impression. Feel free to contact us for free sample testing.
Related:
Can you sublimate on sticker vinyl?
Sublimation sticker vinyl: Your Complete DIY Guide


